
Easy Instant Pot Apple Cider
Nothing says fall quite like the aroma of warm, spiced apple cider wafting through your home. With this easy Instant Pot apple cider recipe, you can enjoy a cozy, homemade version in a fraction of the time—no stovetop simmering for hours required!
Whether you’re hosting a fall gathering, need a warm drink for a chilly day, or just want your home to smell amazing, this pressure cooker apple cider is fast, flavorful, and family-friendly.
What Is Apple Cider?
Apple cider is a warm, spiced beverage made by simmering apples with cozy spices like cinnamon, cloves, and allspice. Unlike store-bought versions, homemade apple cider has no preservatives and can be sweetened naturally with fruits or a touch of brown sugar or maple syrup.
The Instant Pot makes this process quick and easy while still delivering deep, spiced flavor.
Why Rosehips?
You might be wondering, Why are there rosehips in this apple cider? Good question! Most apple cider recipes call for oranges because they offer both a citrus flavor and are high in vitamin C. But when I went to make this recipe, I realized that I didn’t have any oranges on hand. But I did have rosehips, and while rosehips don’t have the citrus flavor that oranges have, they are, however, very high in vitamin C. Rosehips don’t really have a flavor, so they are great to add without changing the flavor. But if you prefer the citrus orange taste, please feel free to use oranges. You can get dried rosehips here
Tools You’ll Need
- 6- or 8-quart Instant Pot
- Cutting board and knife
- Fine mesh strainer or cheesecloth
- Wooden spoon or potato masher
- Ladle and heatproof containers for serving
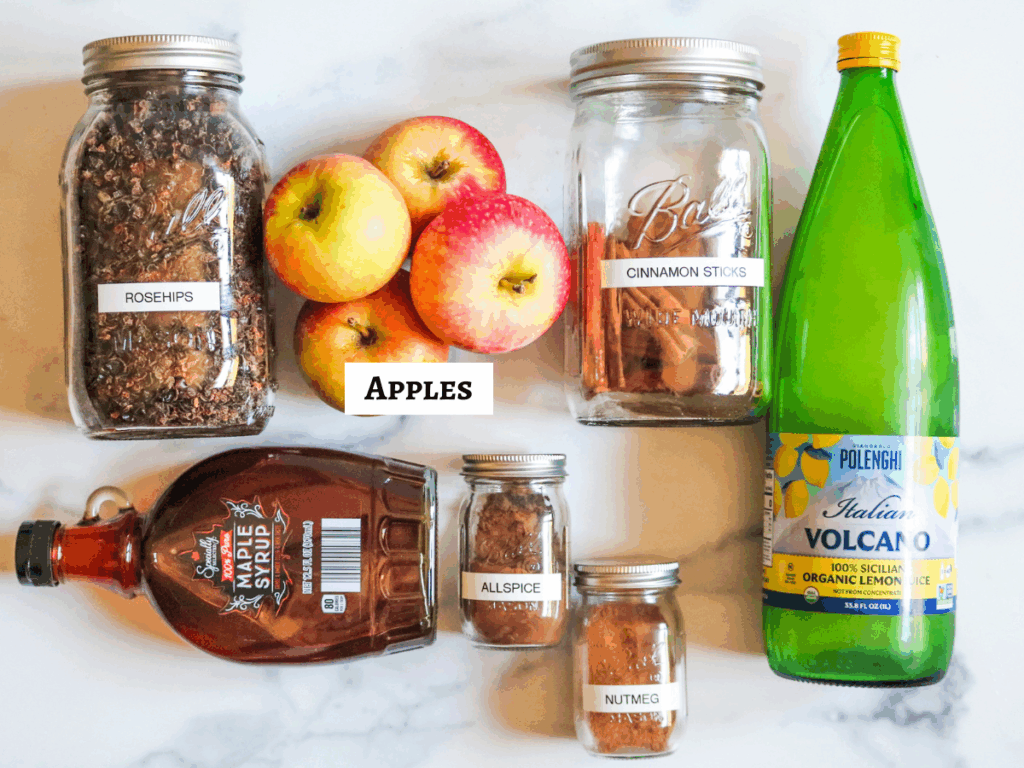
Ingredients for Instant Pot Apple Cider
You’ll need just a few simple ingredients, most of which are fall staples:
- apples
- dried rosehips, for the vitamin C benefit. You can use oranges as well
- cinnamon sticks
- ground nutmeg
- ground allspice
- maple syrup (adjust to taste)
- lemon juice
- 8 cups water
Optional Add-ins:
- Star anise for a licorice-like note
- Cranberries for tartness and color
- Vanilla extract for a smooth finish
Step-by-Step Instructions
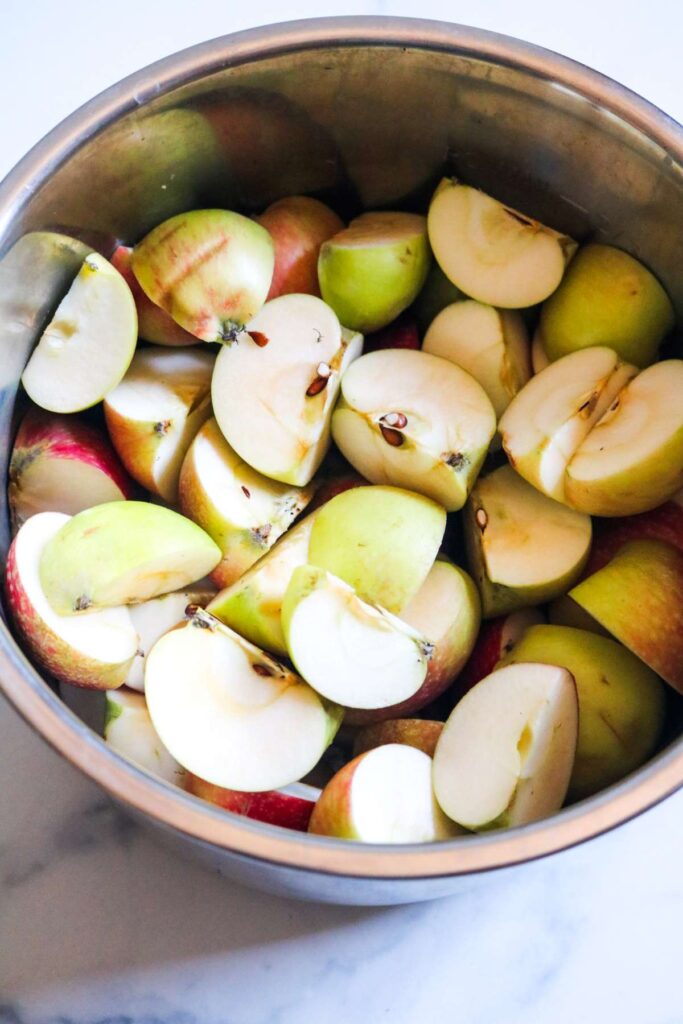
Step 1: Prepare the Fruit
Wash and quarter the apples (no need to peel or core).
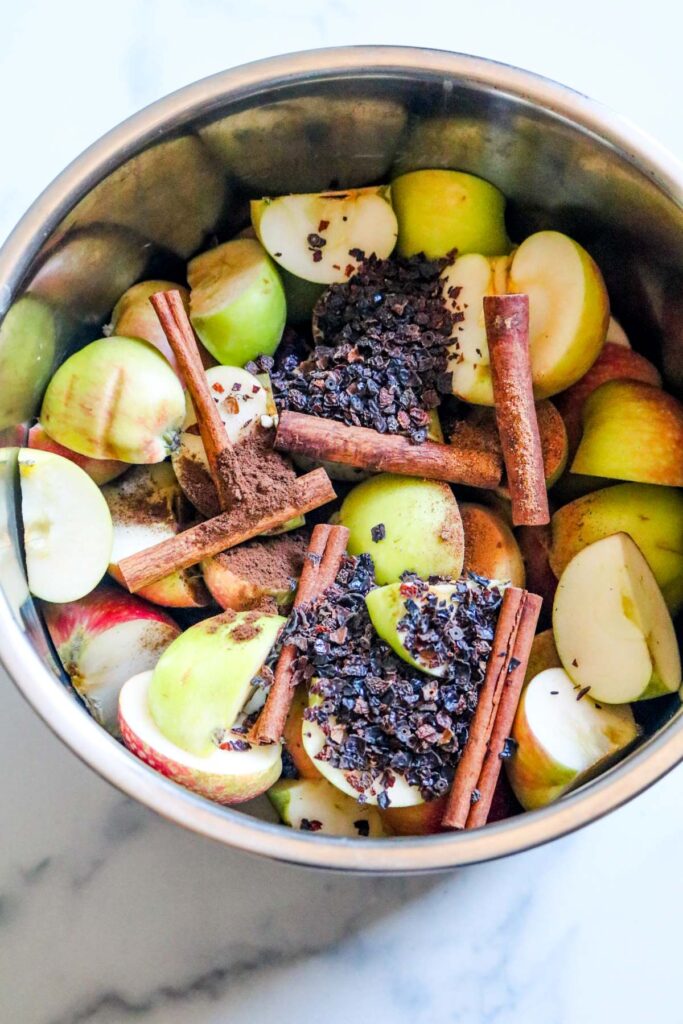
Step 2: Add to Instant Pot
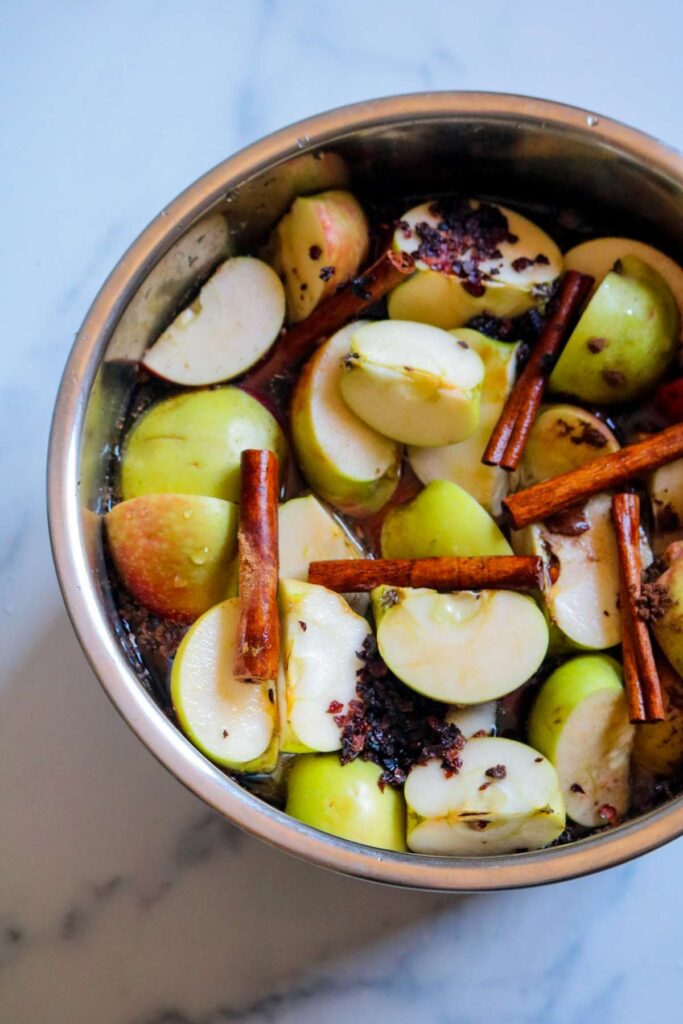
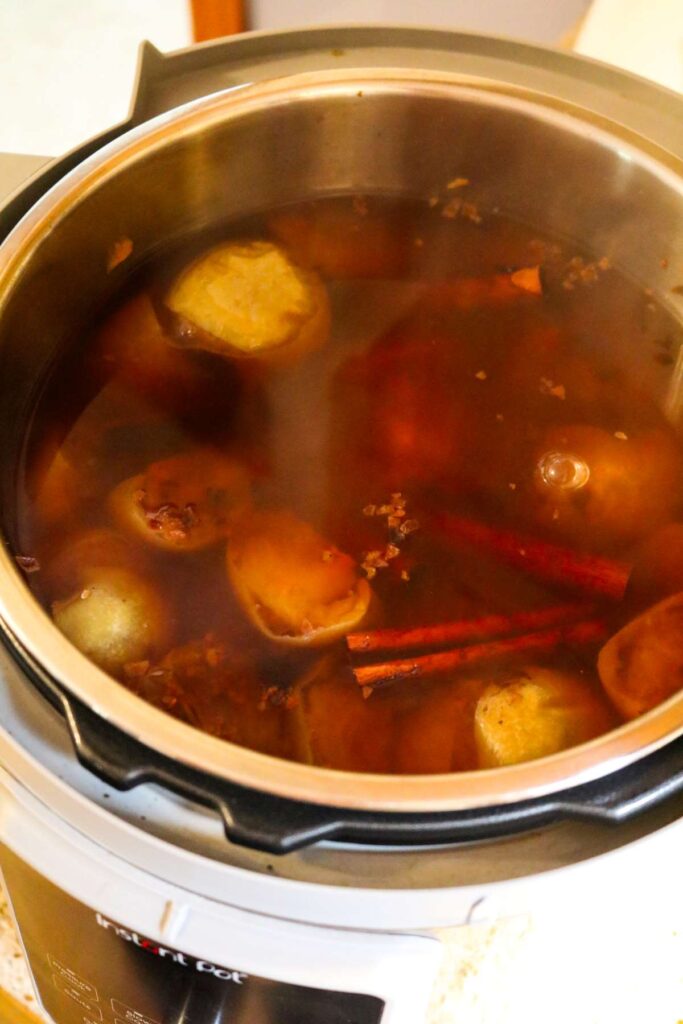
Place apples, rosehips, cinnamon sticks, nutmeg, allspice, lemon juice, maple syrup, and water into the Instant Pot.
Step 3: Pressure Cook
Secure the lid and set the valve to “Sealing.” Select the Manual (Pressure Cook) function and cook on High Pressure for 15 minutes.
Step 4: Natural Release
Let the pressure release naturally for 15–20 minutes, then carefully turn the valve to “Venting” to release any remaining pressure.
Step 5: Mash the Fruit
Open the lid and use a wooden spoon or potato masher to mash the fruit and release more flavor into the cider.
Step 6: Strain and Serve
Place a funnel and fine mesh strainer or cheesecloth over a large bowl or mason jar. Carefully pour the cider through to strain out solids. Discard the fruit pulp.
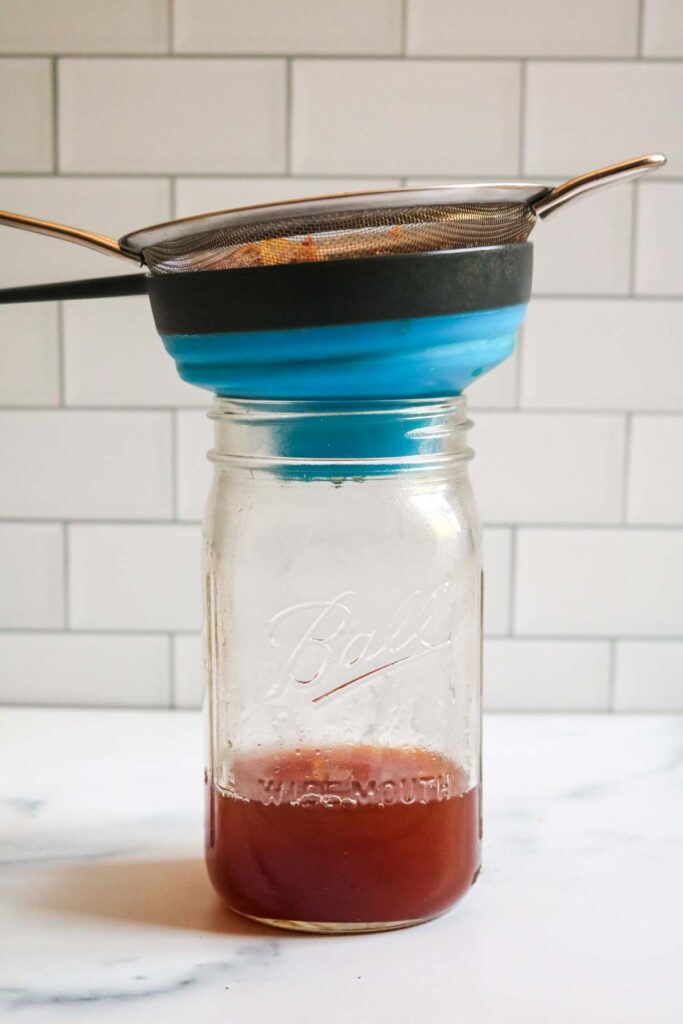
Taste the cider and adjust the sweetness if needed. Serve hot with a cinnamon stick or orange slice.
Tips for the Best Instant Pot Apple Cider
- Use a mix of apples: Combining sweet and tart varieties creates a well-balanced cider.
- Don’t peel or core apples: The skins and cores add flavor and body to the cider.
- Strain well: Use cheesecloth or a fine mesh strainer for smooth, pulp-free cider.
- Serve warm or cold: Enjoy hot on chilly days or chilled over ice as a fall refresher.
- Make it ahead: Store in the fridge for up to 1 week or freeze for up to 3 months.
Instant Pot Apple Cider FAQ
Can I make this cider without an Instant Pot?
Yes! Simmer the same ingredients in a large stockpot on the stove for 1.5–2 hours, covered, then mash, strain, and serve.
How do I sweeten without sugar?
Use maple syrup, honey, or let the apples’ natural sugars shine by skipping sweeteners altogether.
What are the best apples for cider?
Use a mix! Sweet apples like Fuji or Gala pair well with tart ones like Granny Smith or Pink Lady for rich, balanced flavor.
Can I spike it for adults?
Absolutely! Add a splash of bourbon, spiced rum, or whiskey for a festive adult version.
How long does homemade apple cider last?
Store cooled cider in an airtight container in the refrigerator for up to 7 days. Reheat as needed. It also freezes beautifully for up to 3 months.
Serving Ideas & Pairings
Homemade apple cider pairs wonderfully with:
- Pumpkin bread or apple muffins
- Cinnamon sugar donuts
- Cheese platters (sharp cheddar is a classic!)
- Holiday meals or brunch spreads
Serve in a mug with a cinnamon stick or orange slice for a cozy, picture-perfect presentation.
How to Store & Reheat
- Refrigerate: Let cool, then transfer to a sealed jar or pitcher. Keep for up to 1 week.
- Freeze: Store in a freezer-safe container, leaving room for expansion. Thaw overnight in the fridge.
- Reheat: Gently warm on the stovetop or in the microwave. Avoid boiling to preserve flavor.
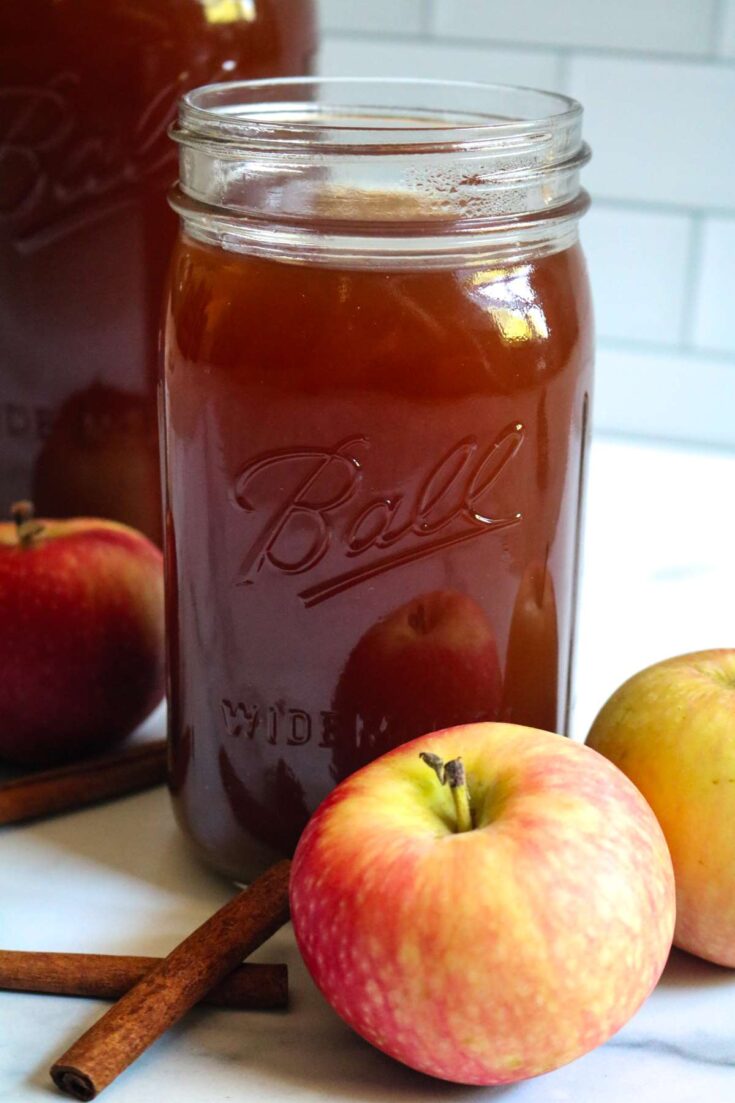
This Instant Pot apple cider is the ultimate fall comfort drink—quick, cozy, and packed with flavor. Using real apples and warm spices, it’s a naturally sweet, wholesome treat that your whole family will love.
Best of all, the Instant Pot does all the work, delivering rich homemade flavor in under an hour. Whether you’re sipping it by the fire, serving it at Thanksgiving, or just want your kitchen to smell like fall heaven, this recipe is a must-try!
Easy Instant Pot Apple Cider
Nothing says fall quite like the aroma of warm, spiced apple cider wafting through your home. With this easy Instant Pot apple cider recipe, you can enjoy a cozy, homemade version in a fraction of the time—no stovetop simmering for hours required!
Ingredients
- 8-10 medium size apples, any kind
- 5 cinnamon sticks
- 2 tsp ground nutmeg
- 2 tsp ground allspice
- 1/2 c dried rosehips
- 1/4 c lemon juice
- 1 c maple syrup or brown sugar
- enough water to cover and fill to max line on instant pot
Instructions
- Cut apples into quarters, leaving the skin on
- Place apples, rosehips, cinnamon sticks, nutmeg, allspice, maple syrup, lemon juice, and water into the Instant Pot
- Secure the lid and set the valve to the sealing position. Select manual (pressure cook) on high for 15 mins
- Natural release 15-20 mins. Turn the valve to venting
- Open the lid and use a potato masher to press the fruit, releasing more flavor into the cider.
- Place a funnel over a mason jar and a mesh strainer on top of the funnel. Carefully pour cider into a strainer.
- Let the cider cool before placing it into the refrigerator.
Notes
I use the 6 qt Instant Pot. If you have the bigger 8-qt Instant Pot, add more apples if desired.